OLAP Data Cube Wizard
Once you have added an OLAP Data Cube object to your form, you can double-click on the object to open the OLAP wizard. Here are the steps you will follow to create the OLAP Data Cube:
- Configure the main properties of the cube.
- Build the SQL statements.
- Configure Measures.
- Configure Dimensions.
- Apply a Style.
Once you have completed the wizard you will be taken back to the Form Designer screen. Visit Scheduling OLAP Data Cubes for specific instructions on creating scheduled cubes.
Also refer to Example 6 (Creating a Filtered OLAP Data Cube) in the Argos DataBlock Designers Guide. This example contains a step-by-step tutorial demonstrating how to build a filtered OLAP Data Cube.
Configure the main properties of the cube
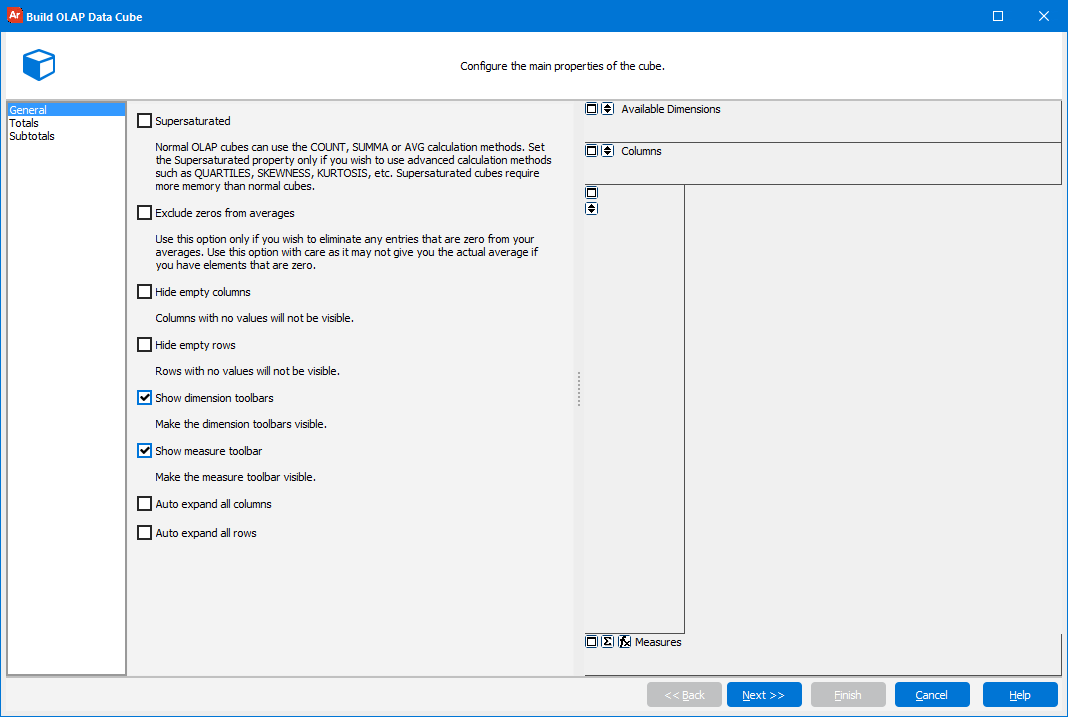
- Supersaturated - Required for measures with a Method of Calculation set to anything other than Summa, Count or Avg. Normally, when a dataset returns multiple rows that contain the same dimension values, the OLAP Data Cube will aggregate those rows into a single row (for efficiency). However, the advanced calculation measures require that this not occur. For example, the MIN or MAX calculations would be wrong if you aggregated multiple rows together. Only check this option if you intend to use any of the advanced calculation methods.
- Exclude zeroes from averages - Columns with 0 values will not dilute an average.
- Hide empty columns - Columns with no values will not be visible.
- Hide empty rows - Rows with no values will not be visible.
- Show dimension toolbars - Make the dimension toolbar visible.
- Show measure toolbar - Make the measure toolbar visible.
- Auto expand all columns - All columns will be expanded automatically when the cube loads. Enabling this option may negatively impact performance for cubes containing large amounts of nested data.
- Auto expand all rows - All rows will be expanded automatically when the cube loads. Enabling this option may negatively impact performance for cubes containing large amounts of nested data.
Format Total Columns
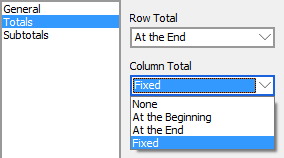
Select the location of both the row and column totals. Selecting None will hide the totals. Fixed places the totals at the end and fixes them in place so they always appear along the bottom, instead of requiring you to scroll all the way down.
Format Sub Total Columns
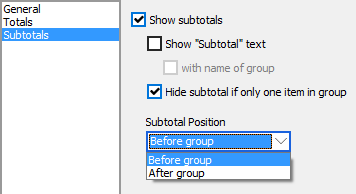
If you choose to show the subtotals you can then select the positioning for them.
Need More Help?
If you need additional help creating OLAP Cubes, refer to the Getting Started with OLAP Cubes page.
Also refer to Example 6 (Creating a Filtered OLAP Data Cube) in the Argos DataBlock Designers Guide. This example contains a step-by-step tutorial demonstrating how to build a filtered OLAP Data Cube.